Follow Me On Social Media!
Santa Claus Dome Cakes: Irresistibly Festive and Fun!
Introduction to Santa Claus Dome Cakes
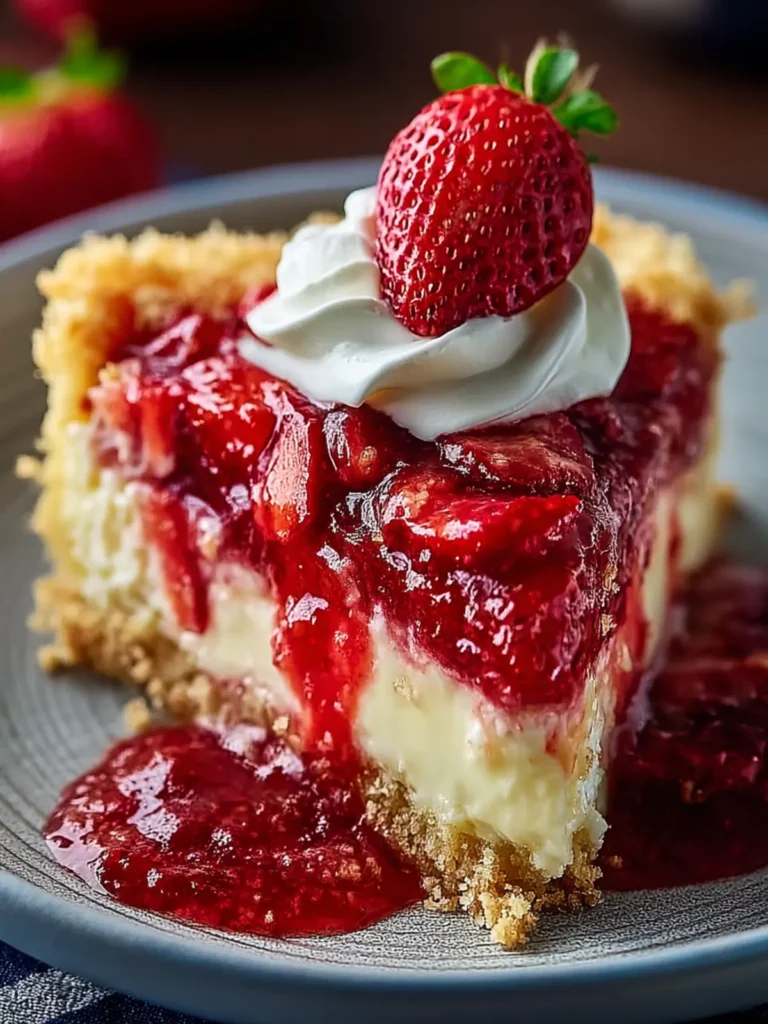
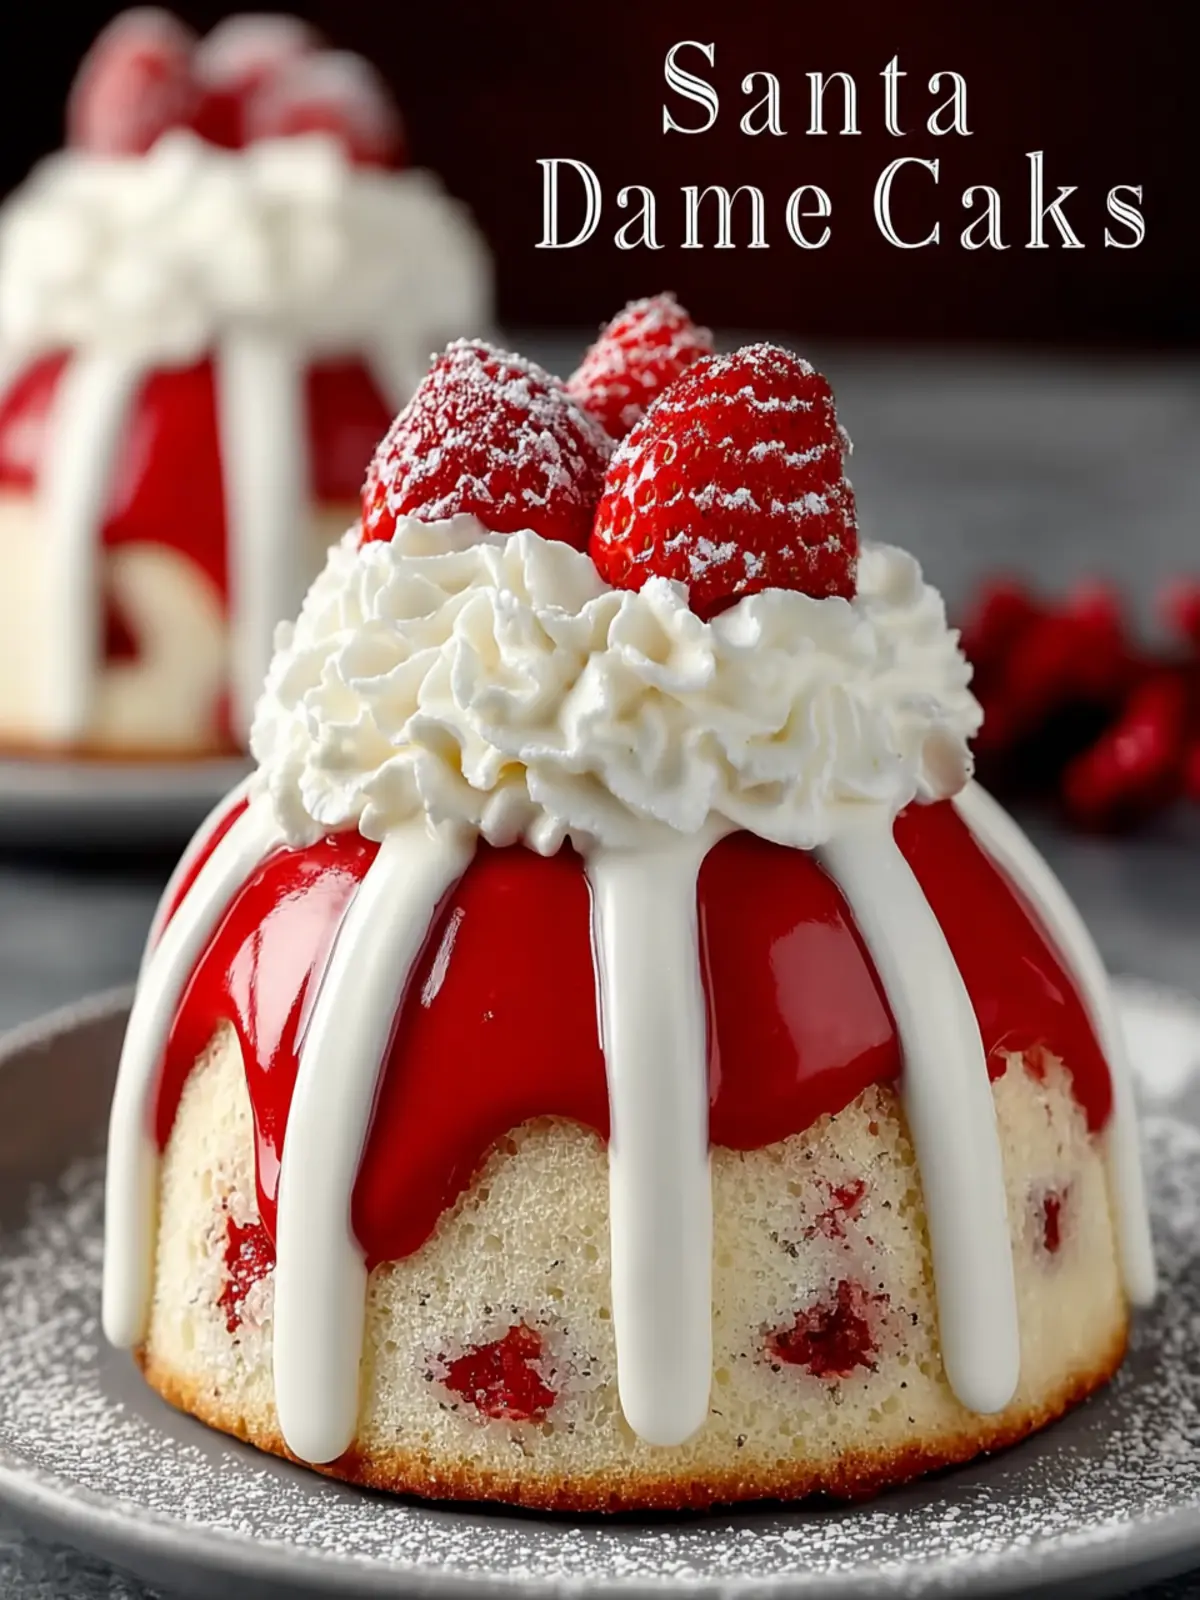
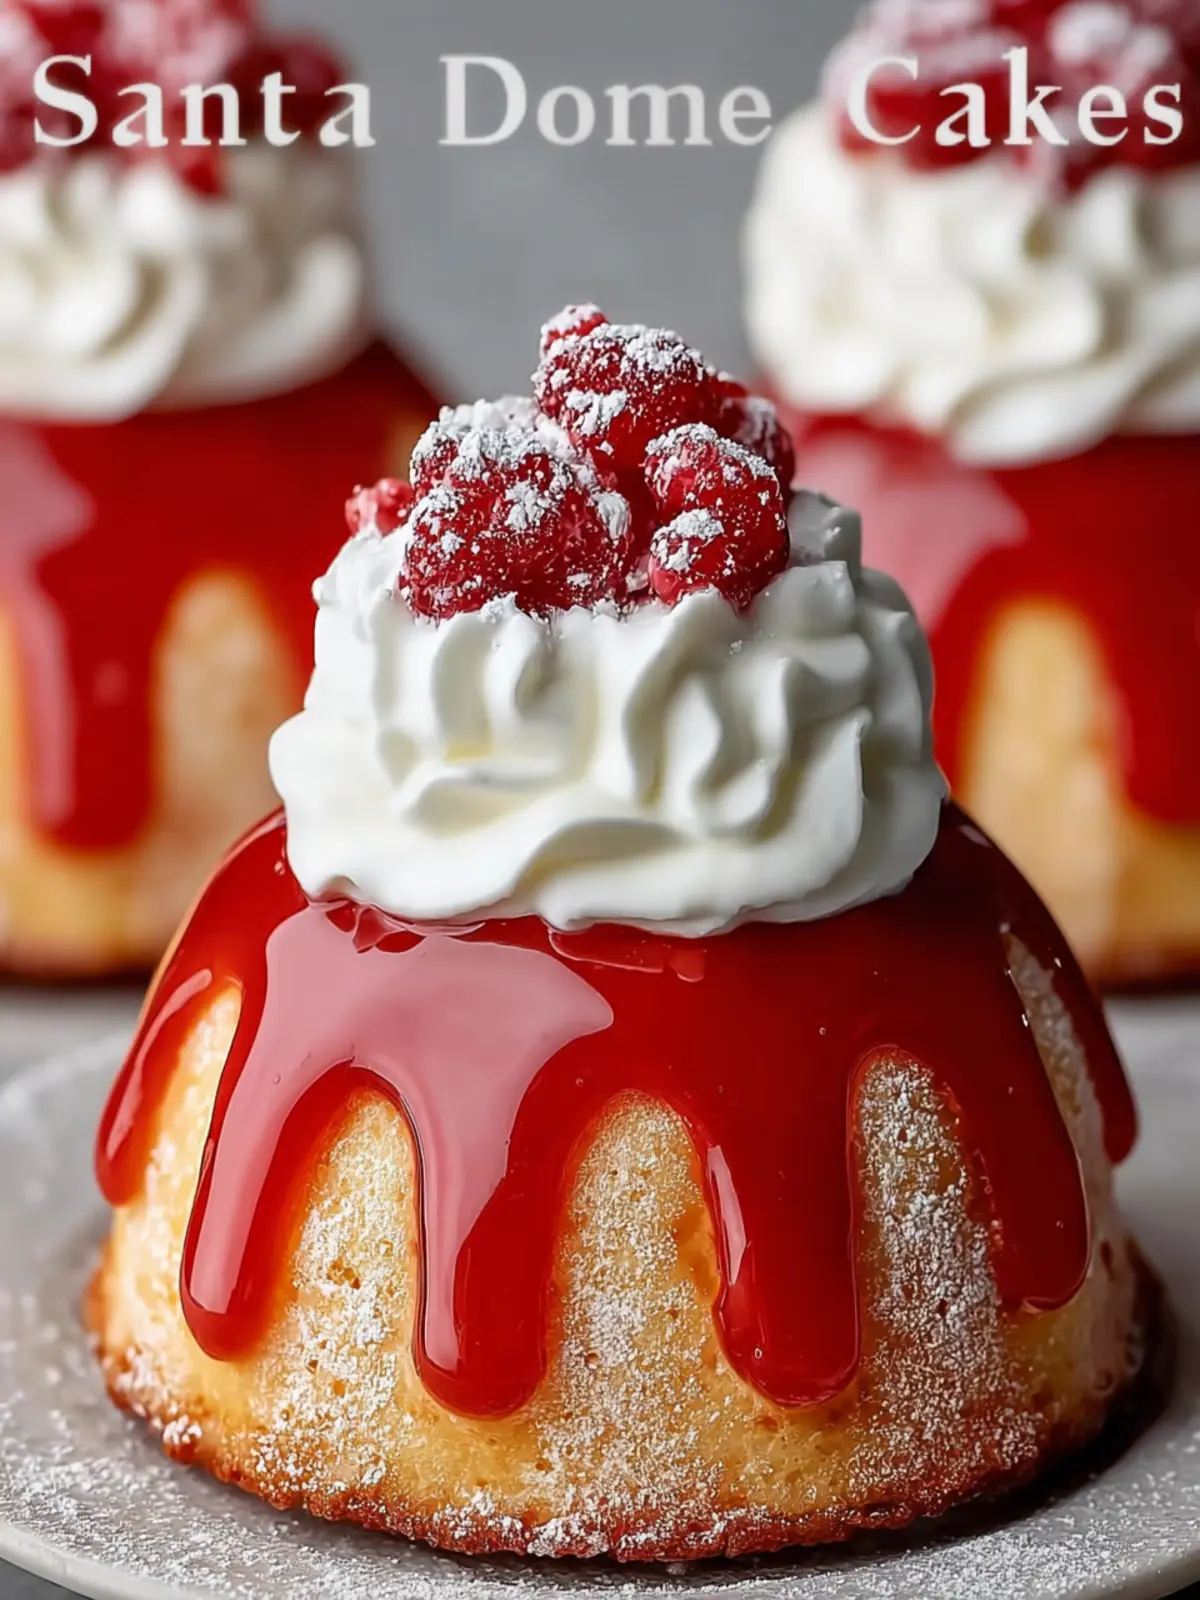
Have you ever experienced the joy of baking something so festive that it becomes the centerpiece of your holiday table? Santa Claus Dome Cakes are not just delightful in appearance; they also encapsulate the spirit of holiday cheer. These charming treats bring a whimsical twist to traditional desserts, instantly sparking joy and laughter among friends and family.
Crafting Santa Claus Dome Cakes is like playing with edible art. Imagine your kitchen filled with the warm aroma of baking chocolate, alongside the sweet smell of vanilla filling the air. As you mold and decorate these dome-shaped cakes, the festive spirit transforms your ordinary baking session into a merry celebration. Each dome, capped off with a fluffy layer of cream, resembles Santa’s jolly face and invites everyone to indulge in a piece of holiday magic.
What makes Santa Claus Dome Cakes so special?
-
Visual Appeal: At first glance, Santa Claus Dome Cakes are stunning. Their rounded shape and bright decorations make them not just a dessert but a festive centerpiece. The vibrant colors and whimsical designs capture the essence of the holiday season.
-
Versatility: These cakes can be tailored to suit individual tastes. Whether you prefer chocolate, vanilla, or even a fruity flavor, the domes can be adapted to fulfill everyone’s cravings. This adaptability ensures that your dessert can appease various palates, making it ideal for gatherings.
-
Fun for All Ages: The process of decorating Santa Claus Dome Cakes is an enjoyable adventure for both kids and adults. From assembling the cakes to adding accessories like mini chocolate chips for eyes or fluffy coconut for Santa’s beard, creativity knows no bounds.
-
Sweet Memories: Beyond being a delightful treat, baking these cakes is an opportunity to create lasting memories. Whether you’re hosting a holiday gathering or a cozy night in with loved ones, making and sharing these cakes fosters togetherness.
In summary, Santa Claus Dome Cakes combine aesthetic charm with delightful flavors, proving that baking can be both a joyful activity and a cherished holiday tradition. Get ready to don your apron and let the holiday spirit inspire your creation!

Key Ingredients for Santa Claus Dome Cakes
Creating Santa Claus Dome Cakes is a delightful way to celebrate the festive spirit, and selecting the right ingredients is essential for achieving that jolly flair. Here’s a breakdown of the key components that bring these festive domes to life.
-
Cake Mix: Start with a high-quality vanilla cake mix for a light texture that pairs perfectly with the creamy fillings. It’s convenient and delicious—exactly what you need during the busy holiday season.
-
Butter: Use unsalted butter to ensure you can control the amount of salt in the overall flavor. It’s crucial for adding richness and flavor to the cake, as well as for greasing your dome molds.
-
Eggs: Fresh eggs are key for binding the ingredients and helping the cakes rise beautifully. They also add moisture and structure, ensuring your domes are light and fluffy.
-
Cream Cheese: For a luscious filling, cream cheese is a must. It brings a tangy creaminess that balances the cake’s sweetness, and when mixed with powdered sugar, it creates a wonderfully smooth frosting.
-
Red and Green Sprinkles: To add a festive touch, these sprinkles are perfect for decorating the outside of your Santa Claus Dome Cakes. They not only enhance the appearance but also bring a fun crunch.
With these carefully selected ingredients, you’re on your way to creating iconic Santa Claus Dome Cakes that will delight everyone at your holiday gathering.
Why You’ll Love Santa Claus Dome Cakes
Inspired by the joyous spirit of the holiday season, Santa Claus Dome Cakes are not just desserts; they’re delightful edible decorations that bring smiles and warmth to any gathering. Picture this: you walk into a cozy holiday party, and the centerpiece is a stunning display of these festive dome cakes, each one crafted with care, capturing the essence of Santa himself.
A Visual Treat
Each Santa Claus Dome Cake is a little work of art. The smooth dome shape, adorned with bright red icing and fluffy white frosting for Santa’s beard, is sure to catch the eye of every guest. Watching the expressions of delight as slices are served is truly magical.
Flavor that Packs a Punch
Beyond their adorable appearance, these cakes deliver fantastic flavor. With every bite, you’re treated to a rich cake filled with delicious surprises, whether that’s a festive swirl of peppermint or a creamy center that adds that extra layer of decadence.
Perfect for Holiday Gatherings
What’s more, these treats are perfect for sharing. Whether it’s a family gathering or an office holiday party, Santa Claus Dome Cakes are a hit. They make for great conversation starters and encourage everyone to gather around for a sweet moment.
Embrace the festivities this season and bring joy to your home with the deliciousness of Santa Claus Dome Cakes!
Tips for Making Perfect Santa Claus Dome Cakes
Creating Santa Claus Dome Cakes that are not just visually stunning but also delicious requires some thoughtful techniques. Here are my favorite tips to ensure your festive treats turn out perfect every time.
Use a Quality Mold
A dome-shaped silicone mold can make all the difference. They’re flexible, ensuring easy removal of your cake without losing that lovely shape. Plus, they distribute heat evenly, so cooking is consistent.
Balance Your Flavors
When choosing flavors for your Santa Claus Dome Cakes, think about the balance. A rich chocolate or red velvet cake is delightful, but pair it with a tangy cream cheese or vanilla frosting to add depth. It’s like a conversation between your taste buds!
Perfect Your Frosting Technique
For that festive Santa face, create a smooth frosting layer first, which serves as a base. Then, pipe on additional elements for details like the beard, hat, and eyes. Practice makes perfect, so don’t hesitate to experiment with different piping tips to find your favorite.
Chill Before Decorating
Let your cakes chill in the fridge for about an hour before frosting. This helps the layers set and makes them easier to work with. You’ll avoid any crumbling, ensuring a clean and professional finish when decorating.
By following these tips, your Santa Claus Dome Cakes will not only look great but taste fantastic too. Enjoy the festive baking!
Time Details for Santa Claus Dome Cakes
Creating Santa Claus Dome Cakes is a charming way to celebrate the festive season, but understanding the timing is essential to ensure everything goes smoothly. Here’s a helpful breakdown of the various time requirements for your delightful cake-making adventure.
Preparation Time
The prep work for Santa Claus Dome Cakes typically takes about 30 minutes. This includes gathering your ingredients, mixing the batter, and getting those delightful dome molds ready. A little organization goes a long way in making the process efficient!
Freezing Time
Once your cakes are fully assembled, they’ll need to freeze for at least 2 hours. This step is crucial for shaping and decorating, allowing the flavors to meld beautifully while providing the perfect texture.
Total Time
All in all, including preparation and freezing, you’re looking at around 2.5 hours from start to finish before the cakes are ready to be decorated. Planning accordingly will ensure that your Santa Claus Dome Cakes are a joyful centerpiece at your holiday gatherings!
Nutritional Information for Santa Claus Dome Cakes
When diving into the delightful world of Santa Claus Dome Cakes, understanding their nutritional profile can help you enjoy these festive treats while keeping your dietary goals in mind. These charming cakes are perfect for holiday gatherings, and knowing what they’re made of will only enhance your culinary experience.
Calories
Each serving of Santa Claus Dome Cakes packs approximately 280 calories. While they are a treat, the calorie content is balanced with a rich flavor profile that makes each bite feel indulgent yet manageable.
Protein
These festive dome cakes provide around 4 grams of protein per serving. While they may not be a significant source of protein, they certainly offer a delightful way to satisfy your sweet tooth during the holiday season!
Sodium
With about 150 milligrams of sodium per serving, the Santa Claus Dome Cakes remain on the lighter side in terms of salt content, allowing you to enjoy them without too much concern.
These nutritional insights enable you to savor the holiday spirit while being mindful of your intake. After all, food is all about balance and enjoyment!
FAQs about Santa Claus Dome Cakes
Creating delightful Santa Claus Dome Cakes can spark joy in any baking session. To ensure your experience is smooth and enjoyable, I’ve answered some common questions that often pop up when whipping up these festive treats.
How can I ensure the mousse sets correctly?
Achieving the perfect mousse texture is key for your Santa Claus Dome Cakes. The following tips can help:
- Temperature is important: Ensure that all your ingredients, especially the heavy cream, are cold before whipping. This will help create a stable mousse.
- Gelatin is your friend: If your recipe calls for gelatin, make sure to bloom it properly in cold water before incorporating it into the mixture to avoid lumps.
- Whipping: Don’t skimp on whipping your cream—aim for soft peaks for a light, airy mousse that holds its shape upon setting.
Can these dome cakes be made in advance?
Absolutely! One of the best things about Santa Claus Dome Cakes is that they can be prepared ahead of time. In fact, letting them chill in the fridge for at least 6 hours or overnight allows the flavors to meld beautifully. Just be sure to cover them well to prevent moisture loss or absorption of fridge smells. When ready to serve, simply garnish them!
What are some great variations I can try?
There are plenty of fun ways to put a unique spin on your Santa Claus Dome Cakes:
- Flavor infusions: Consider using flavored mousses such as chocolate peppermint, raspberry, or eggnog for a festive twist.
- Decorative elements: To enhance presentation, try adding layers like a cranberry compote or a layer of sponge cake to the inside.
- Alternative toppings: Instead of the usual marzipan, you can use whipped cream, chocolate ganache, or fresh berries for a stunning finishing touch.
With these tips in mind, your Santa Claus Dome Cakes will not just impress your friends, but they’ll be the talk of the holiday gathering!
Conclusion on Santa Claus Dome Cakes
Creating Santa Claus Dome Cakes is not just about the final delicious treat; it’s about crafting a joyful experience that resonates with the holiday spirit. Picture gathering with loved ones, each excitedly decorating their dome cakes, adding personal touches like colorful sprinkles and edible glitter. As you serve these festive delights, witness the smiles and laughter they bring to your celebration. Remember, the secret lies in the richness of your ingredients and the love infused during the baking process. This holiday season, let these charming dome cakes add that special sparkle to your gatherings, creating memories that will warm your heart for years to come.
Print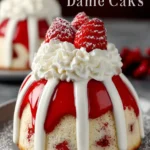
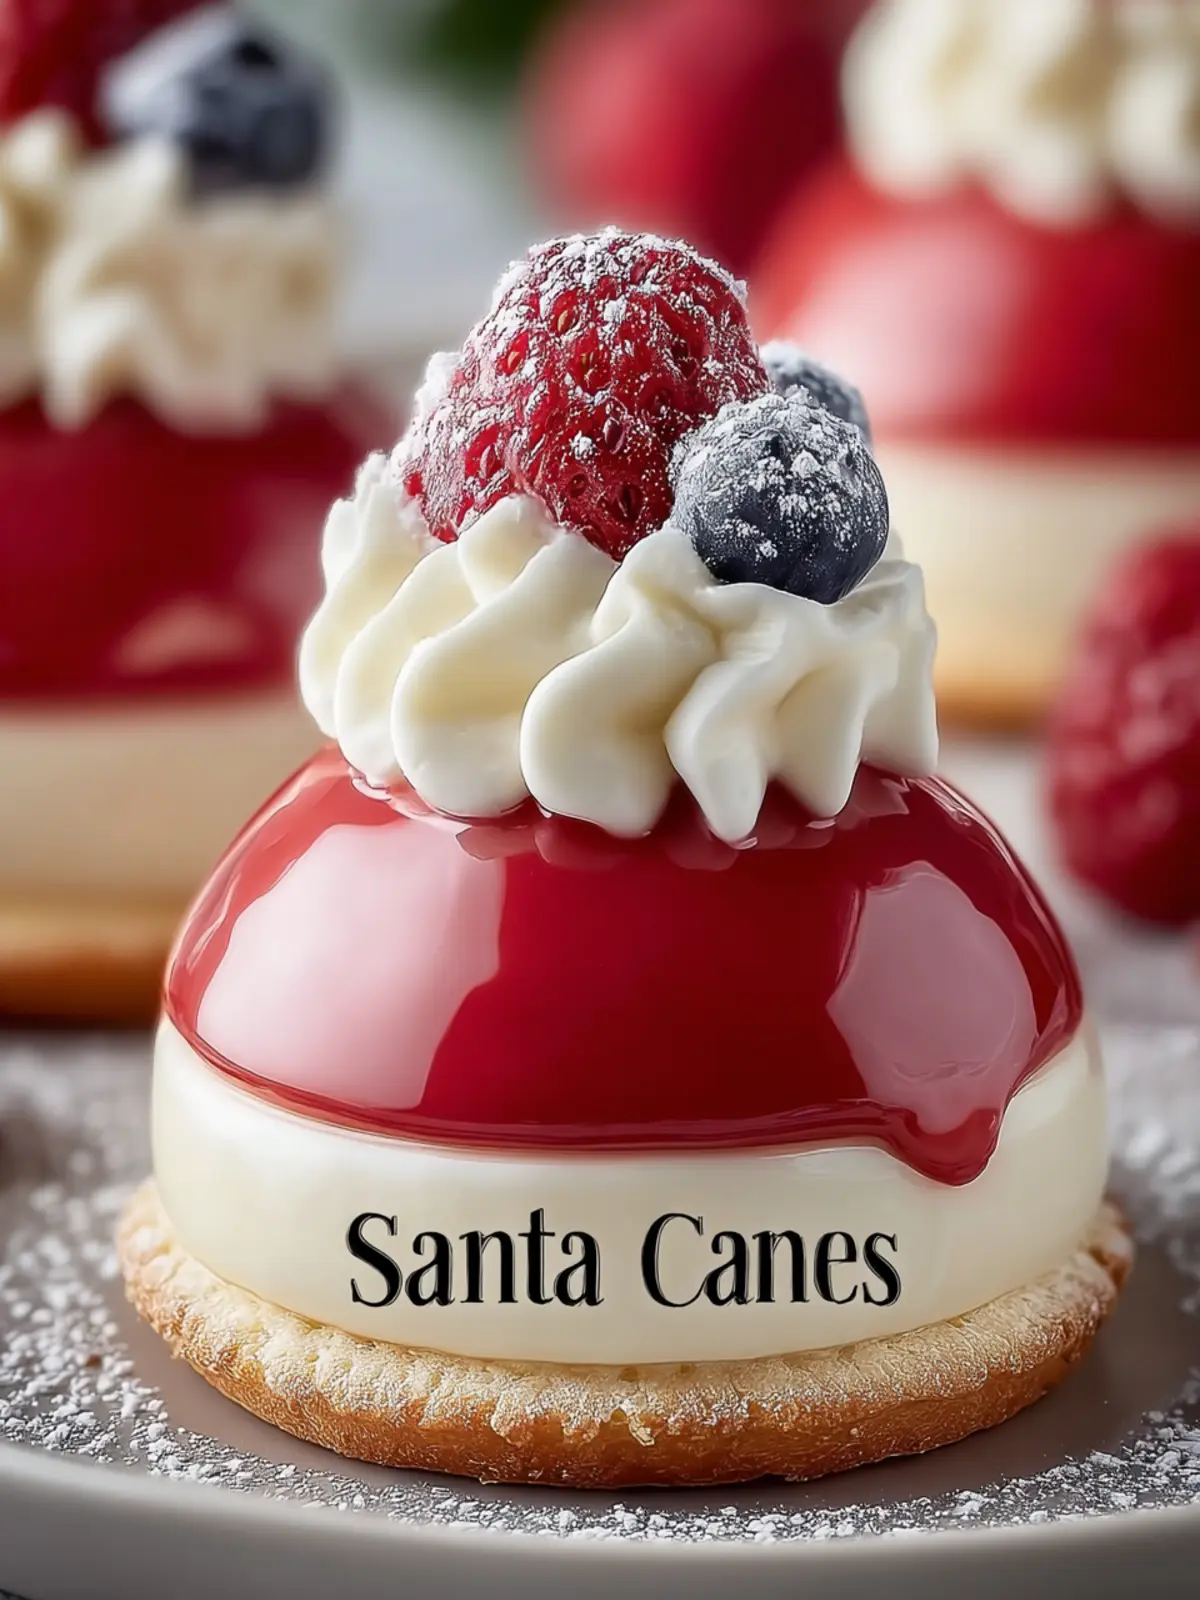
Red Velvet Mousse Domes with Sablé Cookie Base
- Total Time: Overnight
- Yield: 8 servings 1x
- Diet: Vegetarian
Description
Indulge in these elegant Red Velvet Mousse Domes with Sablé Cookie Base, perfect for festive celebrations!
Ingredients
Scale
- 300 ml heavy cream (cold)
- 250 ml whole milk
- 1 vanilla bean or 2 tsp pure vanilla extract
- 3 egg yolks
- 80 g granulated sugar
- 6 g powdered gelatin (about 2 tsp) + 30 ml cold water
- 6–8 fresh strawberries (small, stem removed)
- 120 g unsalted butter (room temperature)
- 80 g powdered sugar
- 1 egg yolk
- 200 g all-purpose flour
- a pinch of salt
- 1 tsp vanilla extract
- 150 g sugar
- 150 g glucose syrup
- 75 ml water
- 100 g sweetened condensed milk
- 150 g white chocolate (finely chopped)
- 10 g powdered gelatin + 60 ml water
- Red gel food coloring
- 100 g white chocolate for the ring and ball
Instructions
- BLOOM THE GELATIN FOR THE MOUSSE: Combine 6 g powdered gelatin with 30 ml cold water in a small bowl and let sit for 10 minutes until fully bloomed.
- HEAT THE MILK AND INFUSE VANILLA: In a saucepan, heat the whole milk and vanilla (bean or extract) over medium heat until warm but not boiling. Remove from heat once warmed through.
- PREPARE THE EGG YOLK MIXTURE: In a separate bowl, whisk the egg yolks and granulated sugar until pale and slightly thickened.
- COOK THE CUSTARD BASE: Slowly pour the warm milk over the egg mixture while whisking constantly. Return the mixture to the saucepan and cook over low heat, stirring gently, until it reaches 82°C (180°F) and thickens slightly.
- INCORPORATE GELATIN AND COOL: Remove the custard from heat, stir in the bloomed gelatin until fully dissolved, and let cool to room temperature.
- FOLD IN WHIPPED CREAM: Whip the cold heavy cream to soft peaks, then gently fold it into the cooled custard base until smooth and fully combined.
- FILL MOLDS WITH MOUSSE AND STRAWBERRIES: Spoon a small amount of mousse into each silicone dome mold, press one whole strawberry into the center, and cover with additional mousse until the mold is filled. Smooth the tops.
- FREEZE THE MOUSSE DOMES: Transfer the molds to the freezer and freeze overnight until completely solid.
- MAKE THE SABLÉ COOKIE DOUGH: Cream the butter and powdered sugar together in a bowl until smooth. Add the egg yolk and vanilla, then mix in the flour and salt until a dough forms.
- ROLL AND CHILL THE DOUGH: Roll the dough between two sheets of parchment paper to a 4 mm thickness. Chill in the refrigerator for 30 minutes.
- BAKE THE COOKIE BASES: Cut rounds slightly larger than your dome molds and place them on a baking sheet lined with parchment. Bake at 170°C (340°F) for 12–14 minutes until lightly golden. Cool completely.
- BLOOM THE GELATIN FOR THE GLAZE: In a small bowl, combine 10 g powdered gelatin with 60 ml water and let bloom for 10 minutes.
- HEAT SYRUP BASE FOR GLAZE: In a saucepan, bring sugar, glucose syrup, and water to a boil and cook until it reaches 103°C (217°F).
- FINISH THE GLAZE: Remove the syrup from heat and stir in sweetened condensed milk and the bloomed gelatin until fully dissolved. Pour over chopped white chocolate and let sit for 1 minute.
- BLEND AND COLOR THE GLAZE: Use an immersion blender to blend the mixture until smooth. Add red gel food coloring until it reaches a bright Santa hat red. Let cool to 32–35°C (90–95°F) before using.
- UNMOLD AND GLAZE THE DOMES: Remove the frozen mousse domes from the molds and place on a wire rack over a tray. Pour the red mirror glaze over each dome, letting it coat evenly. Let set for 5 minutes.
- ASSEMBLE THE DOMES ON COOKIES: Use a spatula to gently lift each glazed dome and place it on a sablé cookie base.
- DECORATE WITH WHITE CHOCOLATE: Pipe or mold a ring of melted white chocolate around the base of each dome to create the “fur trim.” Add a small white chocolate ball to the top of each dome to complete the Santa hat look.
Notes
- Use fresh strawberries for better flavor and presentation.
- Ensure the mousse is fully set before glazing for best results.
- Chill the cookie bases before serving for enhanced texture.
- Prep Time: 1 hour
- Cook Time: 30 minutes
- Category: Dessert
- Method: Chilling, Baking
- Cuisine: French
Nutrition
- Serving Size: 1 dome
- Calories: 350
- Sugar: 25g
- Sodium: 150mg
- Fat: 23g
- Saturated Fat: 14g
- Unsaturated Fat: 7g
- Trans Fat: 0g
- Carbohydrates: 30g
- Fiber: 1g
- Protein: 3g
- Cholesterol: 120mg