Follow Me On Social Media!

Classic Whoopie Pies: Easy Chocolate Recipe You’ll Adore
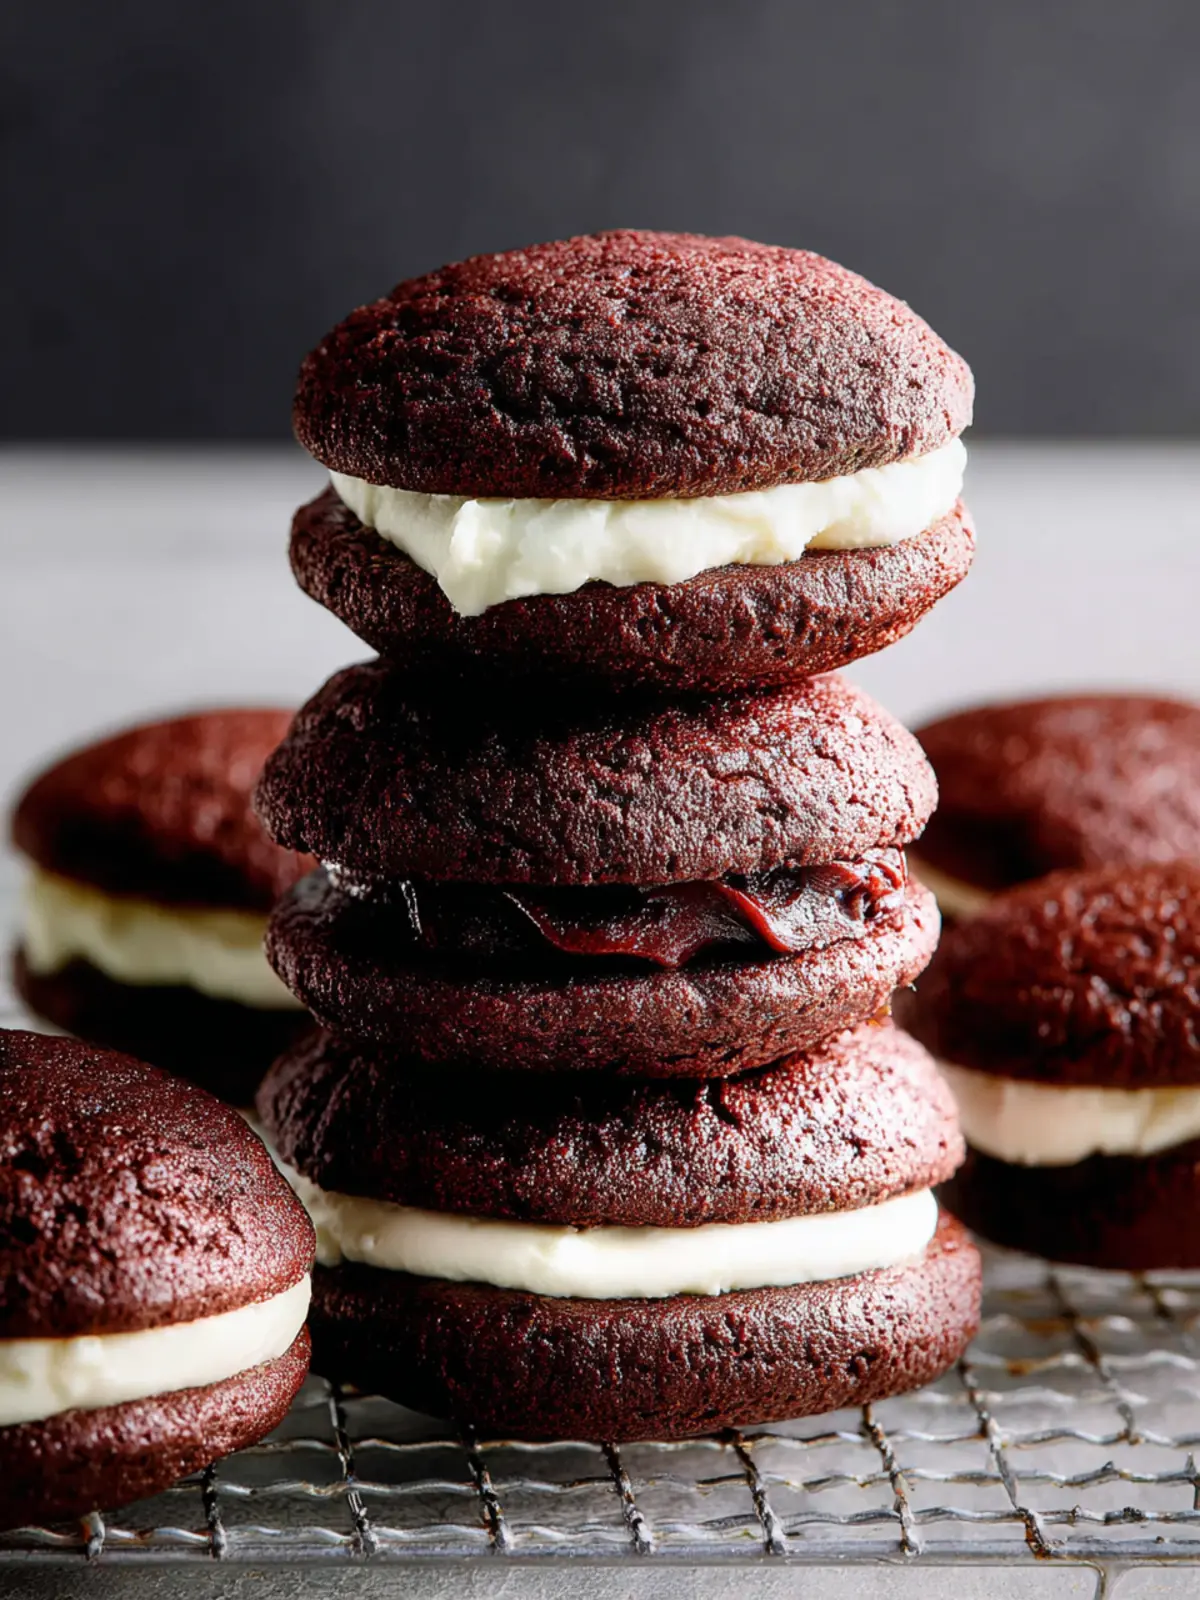
Introduction to Classic Whoopie Pies (easy chocolate recipe)
Imagine indulging in a sweet treat that brings smiles to faces young and old alike—classic whoopie pies do just that! These delightful desserts, a staple of American baking, capture nostalgia with a modern twist. Traditionally originating from the Northeastern United States, whoopie pies are essentially two soft chocolate cakes, sandwiched together with a luscious cream filling. Each bite is a delightful dance of textures and flavors that can take you back to childhood memories of bake sales and family gatherings.
The beauty of classic whoopie pies lies not only in their heavenly taste but also in how incredibly easy they are to make. With a straightforward recipe, you can whip these up for any occasion or simply to satisfy your sweet tooth. Picture an impromptu gathering where you’re the star, bringing out a plate of these tender, chocolatey delights. Friends and family are bound to ask for your secret recipe, and you can proudly say, “It’s this easy!”
One of the reasons whoopie pies have maintained their popularity over the years is their versatility. While the chocolate version is a crowd favorite, you can experiment with different flavors and fillings, making everyone’s heart melt. But let’s not get ahead of ourselves; today, we’re focusing on the classic.
So why are classic whoopie pies a top choice among dessert lovers? Here are a few reasons:
- Texture: The combination of soft cakes with creamy filling is utterly satisfying.
- Portability: They’re perfect for picnics, parties, or just a cozy night in.
- Customizable: Add your favorite extracts or adjust the fillings to your taste.
In the upcoming sections, you’ll discover how simple it is to create these delightful treats. Get ready to embark on a baking adventure that will fill your kitchen with warmth and delicious aromas as you create your own classic whoopie pies!

Key Ingredients for Classic Whoopie Pies
Creating classic whoopie pies is a delightful journey into the world of rich chocolate and creamy filling. Each ingredient plays a role in crafting this sweet treat that brings back nostalgic memories of childhood snacks and family gatherings.
-
Cocoa Powder: Using high-quality unsweetened cocoa powder is essential for that deep, chocolate flavor. This will form the base of your cake-like cookies, providing a rich, indulgent taste that’s hard to resist.
-
Granulated Sugar: Sweetness is paramount for whoopie pies. Granulated sugar not only provides the necessary sweetness but also helps the cookies achieve that perfect soft texture. Don’t skip it!
-
Butter: I prefer using unsalted butter, creamed until fluffy, to give the cookies a rich depth. Butter contributes to the moisture content and enhances the overall flavor, making each bite melt in your mouth.
-
Eggs: Eggs are the binding agents in this recipe. They help the cookies to rise and stay moist, creating that unforgettable soft and chewy texture.
-
All-Purpose Flour: This ingredient provides the structure needed for a balanced cookie. I use all-purpose flour to ensure perfect consistency; it’s versatile and delivers just the right texture.
-
Baking Soda & Salt: Baking soda acts as a leavening agent, helping the cookies to rise, while a pinch of salt balances the sweetness with a touch of contrast.
-
Vanilla Extract: For a hint of warmth and flavor, pure vanilla extract is a must! It elevates the overall taste of the whoopie pies, making them even more irresistible.
-
Marshmallow Cream: For the filling, marshmallow cream creates a sticky, sweet center that complements the chocolate cookies beautifully. You can also mix in some butter for an even richer filling.
Each of these ingredients contributes to the delightful experience of enjoying classic whoopie pies, bringing layers of flavor and texture that will make your homemade treats unforgettable.
Why You’ll Love This Recipe
Classic whoopie pies are more than just a treat; they’re a delightful nod to nostalgia, capable of transporting you back to carefree childhood days filled with laughter and joy. Imagine opening a lunchbox to find two soft, chocolatey cakes hugging a sweet, fluffy filling. These indulgent bites spark happiness with every bite, creating a moment that’s best shared with friends or savored quietly with a cup of coffee.
Here’s why you’ll fall in love with this easy chocolate recipe:
-
Simple Ingredients: You likely have most of the ingredients right in your pantry, making this a hassle-free baking experience. No need to scout for specialty items!
-
Perfect for Any Occasion: Whether it’s a birthday party, a casual get-together, or just a Monday that needs some sweetening up, these classic whoopie pies fit right in.
-
Customizable: While the traditional recipe is mouthwatering as is, you have the freedom to experiment with flavors. How about a peanut butter filling or a sprinkle of sea salt on top?
-
Great for Sharing: Whoopie pies are easy to pack and bring along, making them perfect for picnics or potlucks. Plus, they often disappear faster than you can say “whoopie!”
Embrace the joy of baking and treat yourself to these deliciously nostalgic classic whoopie pies!

Variations on Classic Whoopie Pies
Whoopie pies are not just a delightful treat; they are a canvas for creativity! Each bite brings nostalgia, and the joy of experimenting with flavors can elevate the classic whoopie pies to an extraordinary dessert. Here are some tasty variations to consider:
Flavorful Filling Ideas
-
Peanut Butter Cream: Combine creamy peanut butter with powdered sugar and a splash of vanilla extract for a rich and nutty filling. Perfect for those who crave a savory twist!
-
Marshmallow Fluff: Whip up a fluffy marshmallow cream filling to give your whoopie pies a s’mores-inspired touch. Simply mix marshmallow fluff with a bit of cream cheese and vanilla for extra richness.
-
Fruit Jam: Replace the traditional filling with your favorite fruit jam or curd. Raspberry or lemon curd adds a zesty surprise that perfectly complements the chocolate.
Alternate Cake Bases
-
Red Velvet: Switch it up by using red velvet cake instead of chocolate. The subtle cocoa flavor paired with cream cheese filling makes for a stunning visual and taste experience.
-
Spice Cake: Create a comforting autumnal version with spiced cake mix. A cinnamon cream filling will transport you straight to fall festivals.
Dietary Adjustments
-
Gluten-Free: Use a gluten-free all-purpose flour blend to make everyone happy at the dessert table without sacrificing the beloved texture.
-
Vegan Twist: Substitute eggs with flaxseed meal and use vegan butter for the cake, combining it with a vegan frosting for an inclusive treat.
These variations on the classic whoopie pies not only keep things fresh but also allow you to cater to different tastes and dietary needs. Which one will you try first?
Cooking Tips and Notes for Classic Whoopie Pies
Creating classic whoopie pies can transform a simple baking session into a delightful experience that brings nostalgia and joy. Picture this: you’ve just baked a batch of soft, chocolatey cake rounds sandwiched around a creamy filling, and with each bite, you find yourself smiling like a kid again. Here are some tips to ensure your whoopie pies shine.
Choice of Cocoa Powder: Not all cocoa powders are created equal! For the richest flavor, consider using Dutch-processed cocoa. It will give your cakes a deep, dark color and a smooth taste that pairs beautifully with the sweet filling.
Chill Your Filling: To achieve a perfectly spreadable filling, refrigerate it for about 30 minutes before assembly. This will make it easier to scoop and spread, preventing all that goodness from oozing out when you bite into the pie.
Don’t Overbake: One of the trickiest parts of making classic whoopie pies is ensuring your cakes are moist. Keep an eye on your oven and pull them out when they’re just set. A toothpick should come out with a few moist crumbs — this means you’ve nailed that soft texture.
Assembly Tips: Use two cookies of similar size for your pies. If you want them to look extra neat, use a piping bag for the filling, which also allows for more control.
Enjoy the process, and remember, there’s no such thing as a perfect whoopie pie — just delicious ones!
Serving Suggestions for Classic Whoopie Pies
When it comes to classic whoopie pies, the experience should extend beyond just a delightful bite of chocolate and cream. These treats can be enjoyed in a variety of settings, transforming any occasion into a sweet celebration.
Presentation
- Plate it Up: Arrange the pies on a decorative platter and garnish with fresh berries or a dusting of powdered sugar for an appealing presentation.
- Festive Wrapping: Individually wrap whoopie pies in cellophane and tie them with a ribbon for charming party favors.
Serving Pairings
- Beverage Match: Coffee is a superb companion, complementing the chocolate flavor. Alternatively, pair with a glass of cold milk for a classic combination loved by all ages.
- Ice Cream Sandwich Twist: For an extra indulgence, try making whoopie pie ice cream sandwiches. Simply sandwich a scoop of vanilla ice cream between two pies, and you’ve got a frozen treat that’ll impress guests.
Enjoy Anytime
- Snack Time: Pack whoopie pies in your lunch for a sweet midday pick-me-up or serve them at your next gathering. Their versatility makes them perfect for casual and formal events alike.
Time Breakdown for Classic Whoopie Pies
Baking classic whoopie pies can feel like a delightful journey, and understanding the time commitment helps make it a stress-free experience. Let’s break down the steps so you can plan your sweet adventure seamlessly.
Preparation Time
You’ll want to allocate about 15-20 minutes for preparation. This includes gathering ingredients, mixing the batter, and getting your baking sheets ready.
Chilling Time
After you’ve whipped up your filling, it’s best to chill it for approximately 30 minutes. This step heightens the flavor and improves the texture, ensuring your filling spreads perfectly.
Baking Time
The baking part is relatively quick, taking around 10-12 minutes. Keep an eye on them to achieve that slight dome and soft texture that makes these treats so irresistible.
Total Time
In total, expect to spend around 1 hour and 10 minutes from start to finish. With a little patience and love, you’ll have a batch of delicious classic whoopie pies ready to impress!
Nutritional Facts for Classic Whoopie Pies
When indulging in the delightful world of classic whoopie pies, it’s natural to be curious about what’s in these sweet treats. Here’s a quick look at the nutritional breakdown to satisfy your curiosity.
Calories
One serving of a classic whoopie pie typically contains around 200 to 250 calories. While they pack a flavorful punch, moderation is key to enjoying them without overdoing it.
Sugars
Each whoopie pie can have about 15 to 20 grams of sugar. The sweet filling is what truly makes these desserts a classic, but it’s essential to keep track of your intake, especially if you’re watching your sugar levels.
Fats
With approximately 8 to 10 grams of fat per pie, most of this comes from the butter used in both the cake and filling. Choosing high-quality butter can enhance both flavor and texture while keeping indulgence in check.
Enjoying classic whoopie pies is about balance, so savor the sweetness without guilt!
FAQ about Classic Whoopie Pies
Classic whoopie pies bring a delightful mix of nostalgia and taste, making every bite feel like a warm hug. As you embark on creating these delicious treats, it’s natural to have questions. Let’s dive into some commonly asked questions that can help you master the art of making classic whoopie pies.
How can I store whoopie pies?
To ensure your classic whoopie pies stay fresh, store them in an airtight container. They can be kept at room temperature for up to three days. If you want to extend their life, consider refrigerating them, which can keep them fresh for about a week. Just be sure to let them come to room temperature before serving for the best experience.
Can I make them ahead of time?
Absolutely! Making classic whoopie pies ahead of time is a fantastic idea. You can bake the cookie halves a day or two in advance and store them in a sealed container. The filling can also be prepared ahead of time and stored separately in the refrigerator. When you’re ready to serve, simply assemble them and enjoy!
What if I don’t have cream cheese?
No cream cheese? No problem! You can substitute it with whipped cream or buttercream for the filling. Both options will create a deliciously creamy center for your classic whoopie pies. Just remember that the texture and flavor will differ slightly, but you’ll still achieve that delightful treat everyone loves.
Embrace the journey of baking these classic whoopie pies, and don’t hesitate to experiment along the way to discover your perfect version!
Conclusion on Classic Whoopie Pies
In closing, classic whoopie pies are not just a treat; they’re a slice of nostalgia that brings warmth to any gathering. The soft chocolate cakes, with that creamy filling in between, create a delightful contrast that’s hard to resist. As you indulge in these delectable bites, remember that the joy of baking is both in the process and the end result. These treats are easy to whip up, making them perfect for both seasoned bakers and beginners alike. So gather your ingredients, embrace the magic of homemade desserts, and share the love of whoopie pies with friends and family!
Print
Chocolate Whoopie Pies
- Total Time: 2 hours 35 minutes
- Yield: 12 whoopie pies 1x
- Diet: Vegetarian
Description
Delicious chocolate whoopie pies filled with cream cheese frosting.
Ingredients
Scale
- 3 tablespoons unsalted butter (at room temperature)
- 3 tablespoons oil
- ½ cup brown sugar
- 1 egg (at room temperature)
- 1 teaspoon pure vanilla extract or paste
- 1 teaspoon instant coffee powder or ½ teaspoon coffee extract
- ¾ cup all-purpose or cake flour
- ⅓ cup unsweetened cocoa powder
- ½ teaspoon baking soda
- ¼ teaspoon salt
- 2 tablespoons cream cheese (at room temperature)
- 1 tablespoon unsalted butter (at room temperature)
- 1 to 1 ½ cups powdered sugar
Instructions
- Beat butter with sugar and oil in a bowl for about 1 minute.
- Add egg, vanilla, and coffee and mix until well integrated.
- Sift the cocoa powder over this mixture and mix.
- Add sifted flour, baking soda, and salt in 2 parts. Integrate well but don’t overbeat at this point; only mix to incorporate because the cakes will be tough if beaten too much. If using an electric hand mixer mix at low speed.
- Cover the bowl and refrigerate for about 2 hours, until firm enough to scoop.
- Preheat oven to 350°F (180°C).
- Line a cookie sheet with parchment paper.
- Scoop portions of chocolate dough and place with an inch or two of separation between them. I use a small or medium cookie scoop at the most as they grow quite a bit during baking.
- Bake for 12 to 15 minutes, until crackled, dry, and still slightly soft when barely pressed.
- Let cool completely on a wire rack and fill.
- Keep at room temperature for a day or two if you want, or put in airtight containers. You can also store the whoopies without filling for a few days and fill when ready to eat.
- Mix butter and cheese until creamy and smooth.
- Add 1 cup of powdered sugar little by little until it is very thick. Add more sugar if you want a thicker mixture. You might not need to use the whole 1 1/2 cups.
- Place a teaspoon or two of filling on the flat side of half of the cookies. Spread lightly without reaching the edges.
- Top with the second cookie and press lightly to the filling spreads and fills the whole cookie.
Notes
- For best results, make sure all ingredients are at room temperature before starting.
- These whoopie pies can be stored in an airtight container for up to 2 days.
- Prep Time: 20 minutes
- Cook Time: 15 minutes
- Category: Dessert
- Method: Baking
- Cuisine: American
Nutrition
- Serving Size: 1 whoopie pie
- Calories: 150
- Sugar: 10g
- Sodium: 50mg
- Fat: 7g
- Saturated Fat: 3g
- Unsaturated Fat: 4g
- Trans Fat: 0g
- Carbohydrates: 20g
- Fiber: 1g
- Protein: 2g
- Cholesterol: 25mg